How to Publish Your Website or App with Macaly
Learn how to publish your website with Macaly. You can go live in seconds on a free subdomain, connect your own domain, or register a new one right inside the platform.
Publishing your site takes just a few clicks. Whether you’re sharing it with friends, launching a campaign, or going public with a product, here’s how to make it live.
What You'll Need
- Your in-progress or completed Macaly project.
Step-by-Step Instructions
Step 1: Publish to a Macaly Subdomain
This is the first and most important step to get your project online. You must publish your site before you can connect a custom domain.
- 1
Click the Publish button in the top right corner of your Macaly chat window.
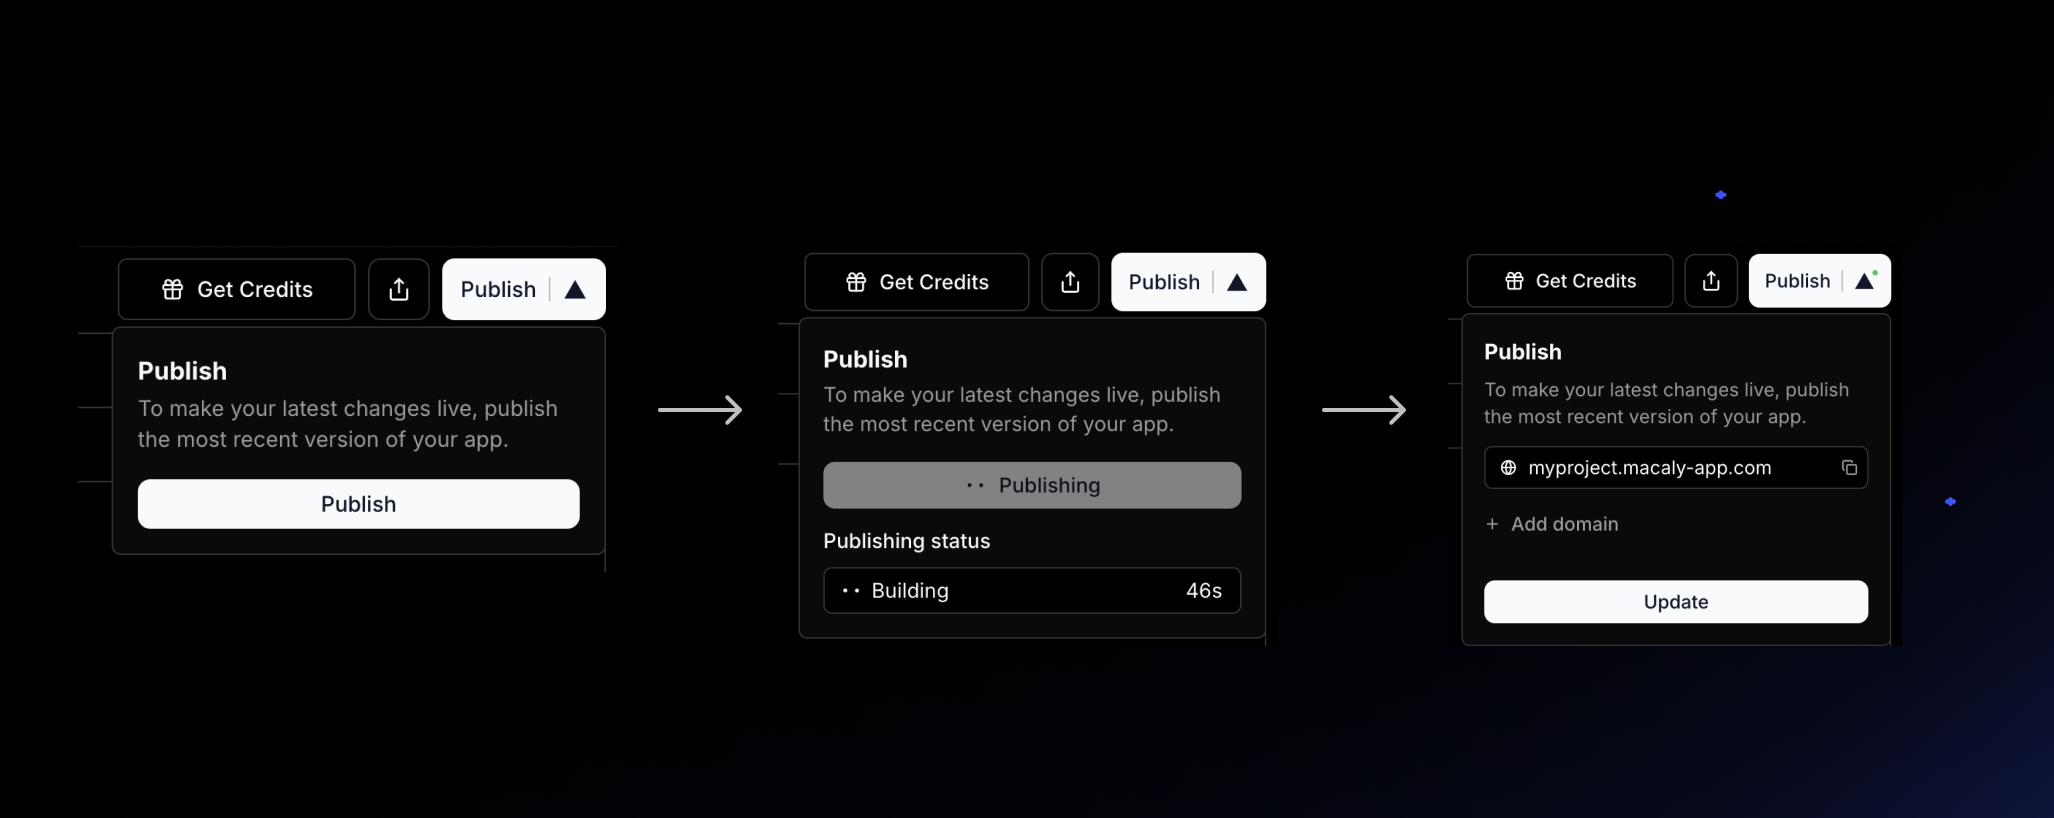 Click Publish in the top right to make your site live.
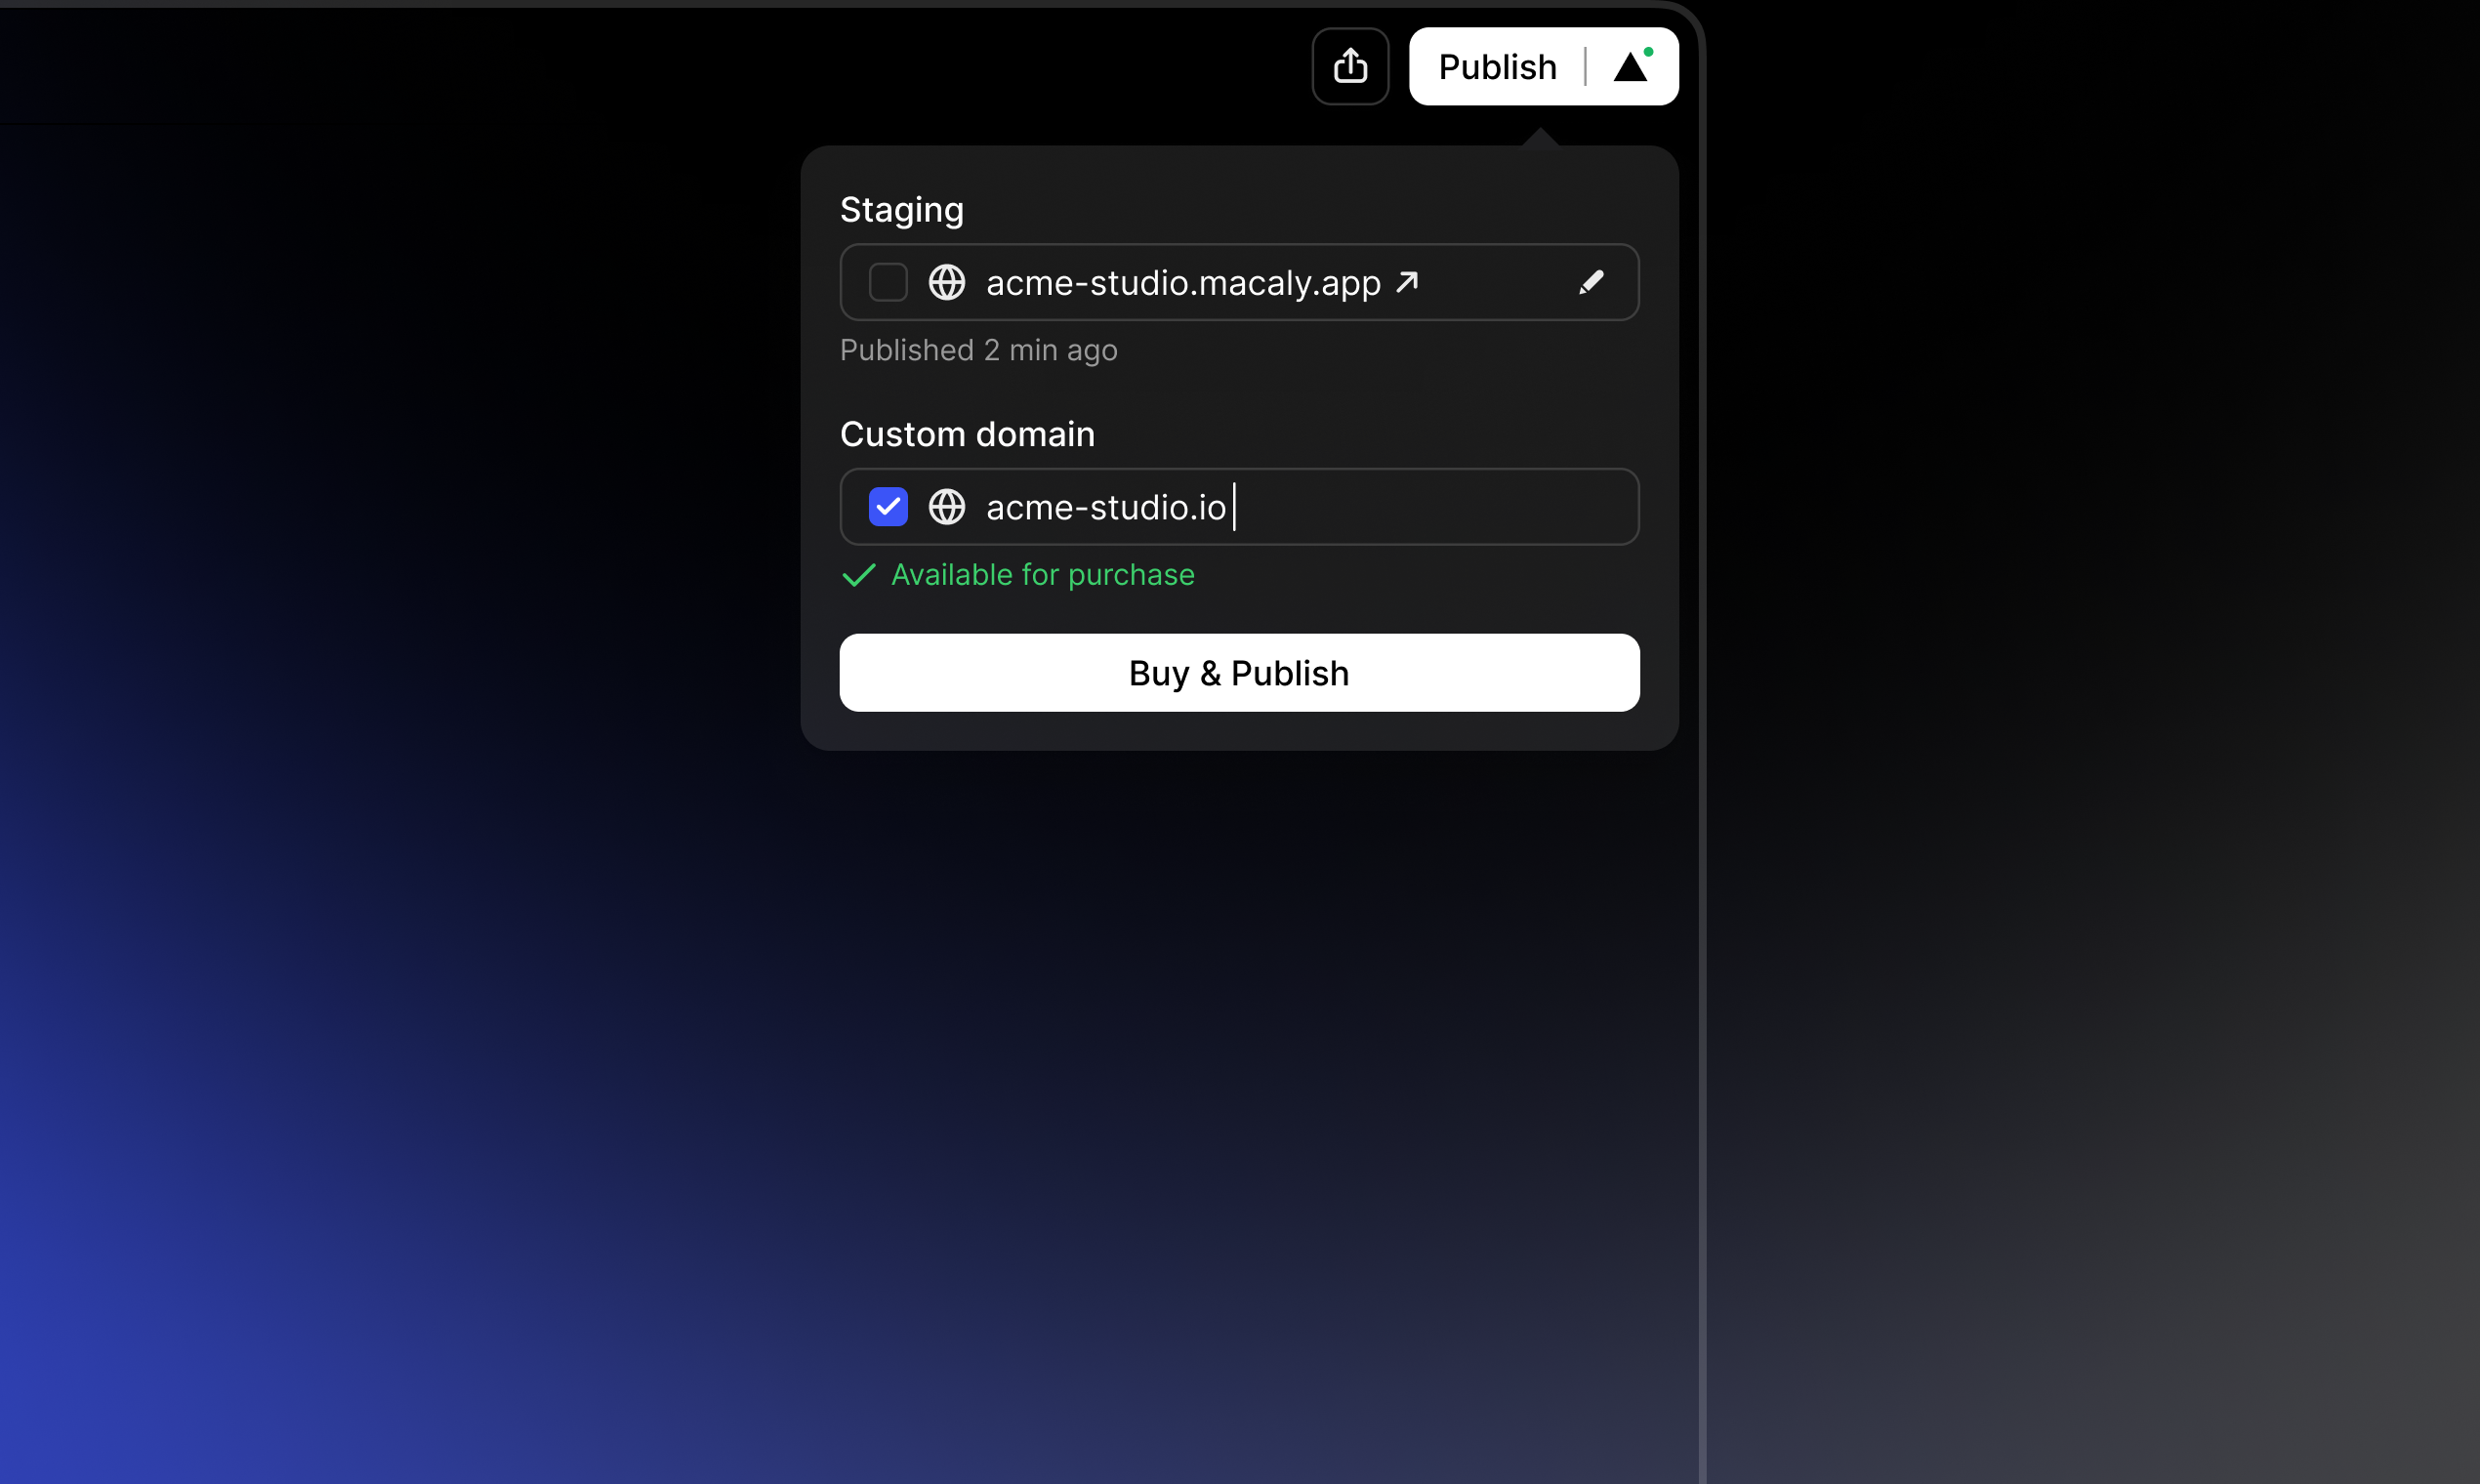
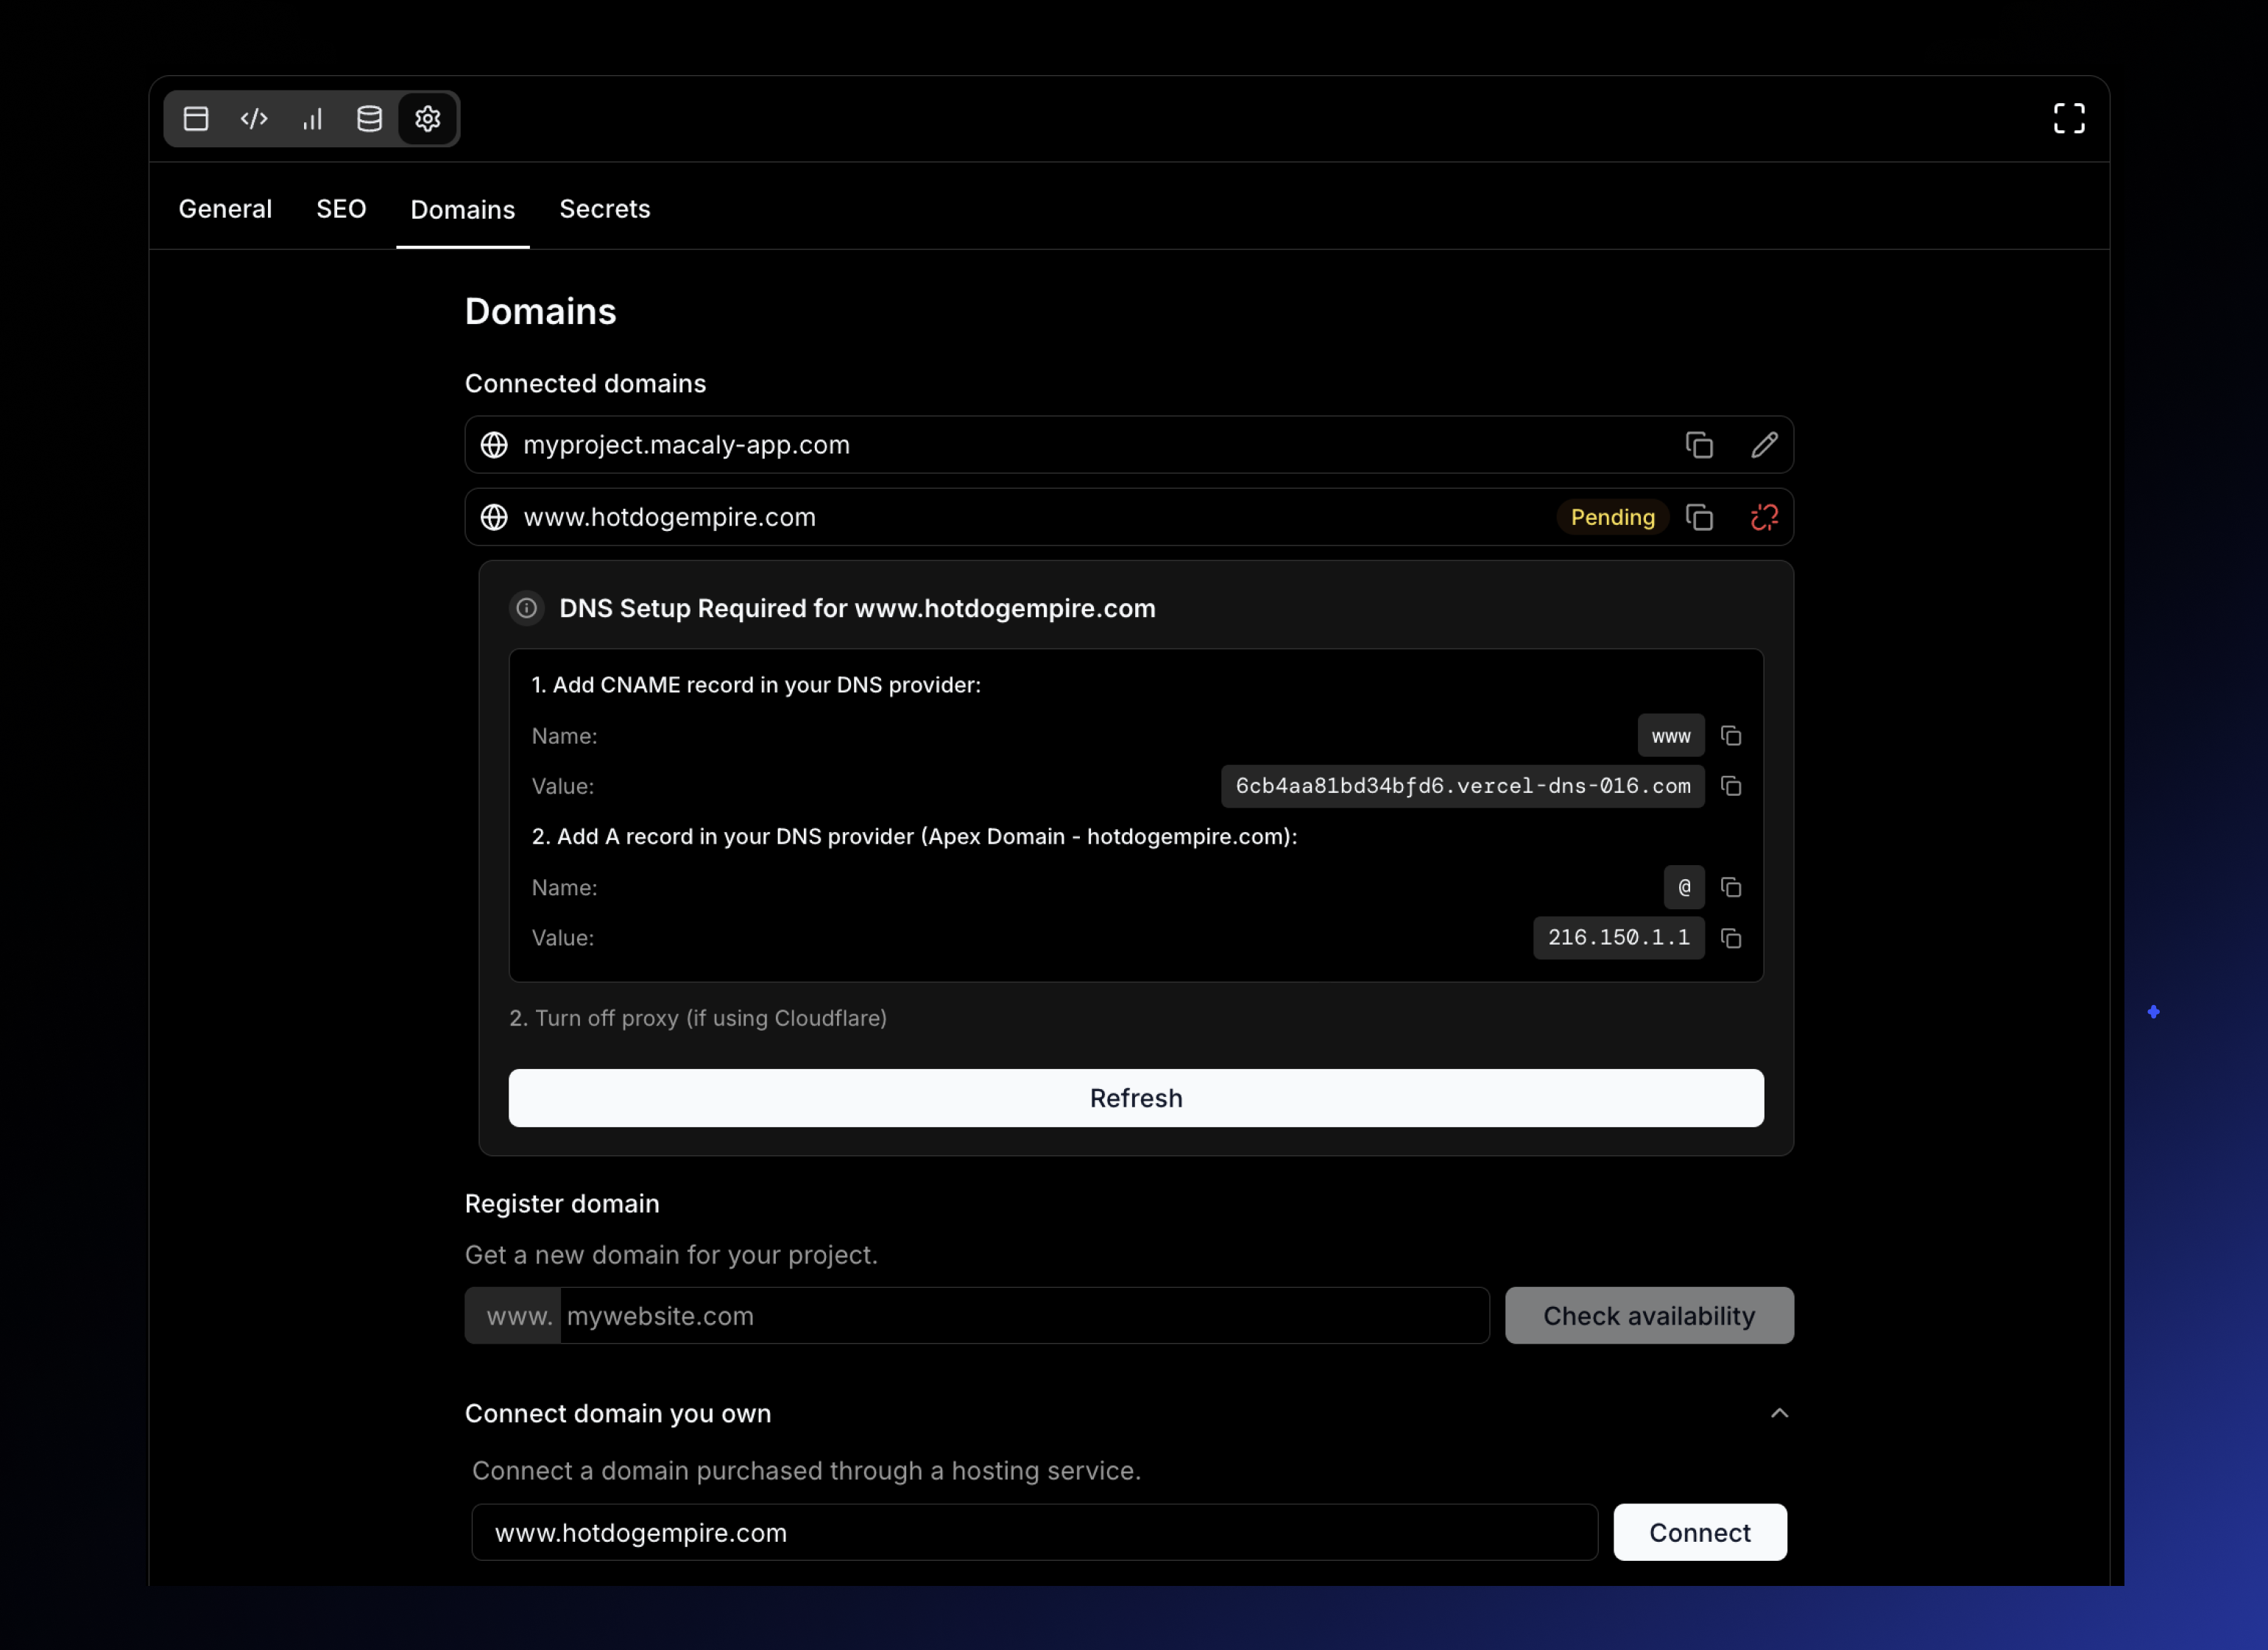
Step 2: Connect Your Own Domain
If you already own a domain from a registrar like GoDaddy, Namecheap, or any other provider, you can easily connect it to your Macaly project.
- 1Navigate to your project Settings and open the Domains tab.
- 2Enter the domain you own into the "Connect domain you own" field and click Connect.
- 3Follow the simple on-screen instructions to add a CNAME record in your domain provider's settings. Macaly will tell you exactly what to copy and paste.
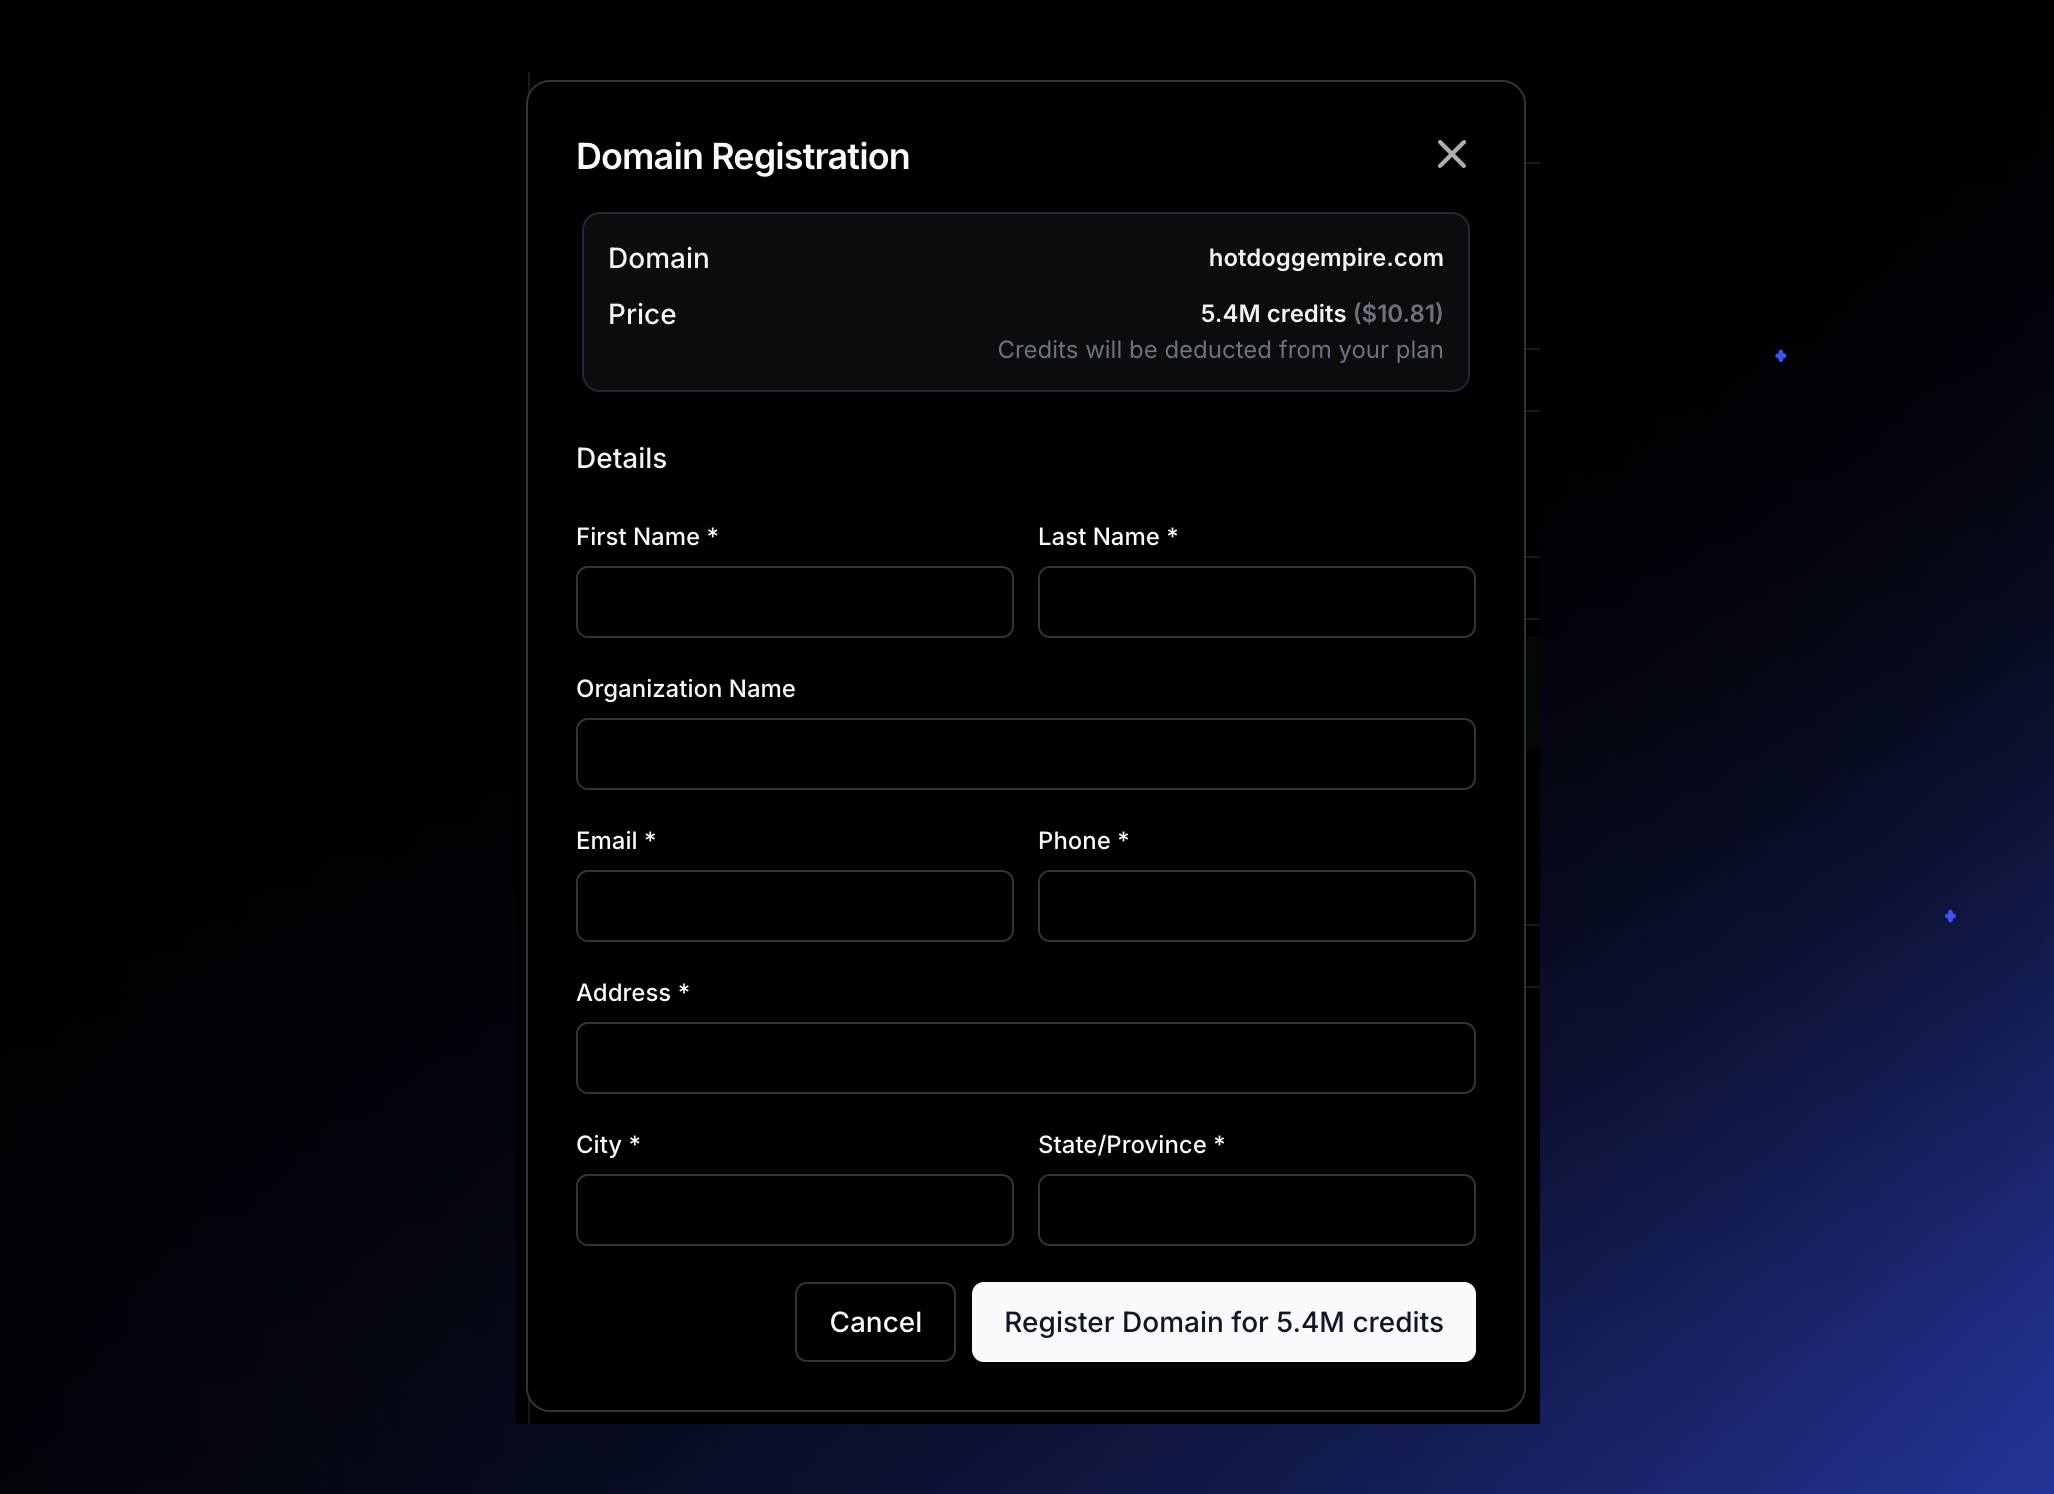
Step 3: Register a New Domain with Macaly
Don't have a domain yet? You can find and register the perfect one right inside Macaly.
- 1Navigate to your project Settings and open the Domains tab.
- 2Use the search bar under "Register domain" to check if your desired domain name is available.
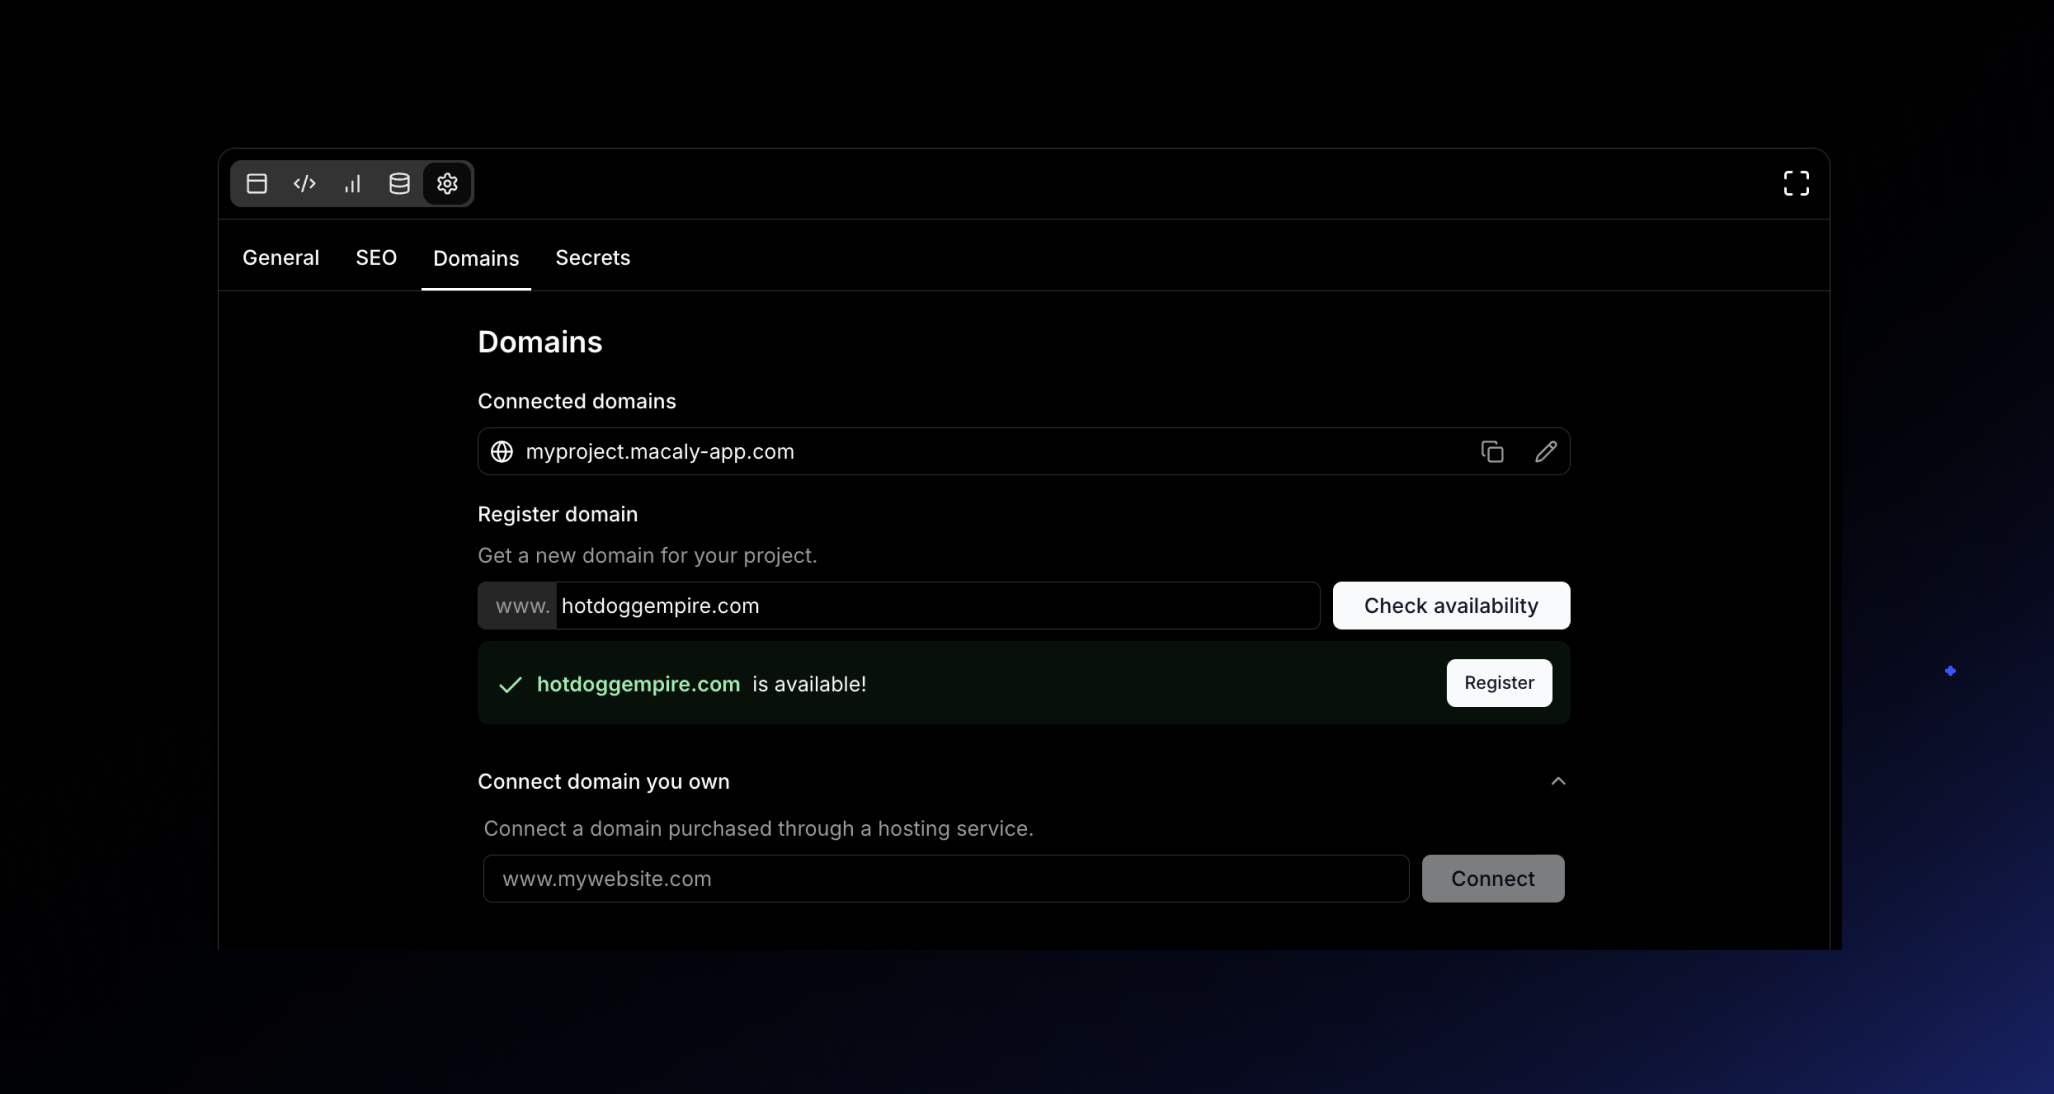
- 3Select your domain and purchase it directly using your Macaly credits.
What's Next?
Congratulations, your project is live! Don't wait for perfection—the faster you publish, the sooner you can share your work, test your ideas, and get valuable feedback. You can always continue editing your project in the chat and re-publish your changes with a single click.