> ## Documentation Index
> Fetch the complete documentation index at: https://www.macaly.com/docs/llms.txt
> Use this file to discover all available pages before exploring further.
# Visual edits
> Learn how to edit content and layout directly on the page
Instead of describing every small change to the AI, you can click on any element and adjust its content, layout, or styling visually. This makes it easier to refine what’s already on the screen and keep changes predictable.
Visual edits is designed for controlled edits. You work with a specific element, see all available settings for it, and apply changes directly.
The Visual edits feature is available only on desktop.
## **What Visual edits is for**
Visual edits is most useful when you already have content on the page and want to refine it.
Common examples include:
* Updating text or headlines
* Adjusting spacing, padding, or alignment
* Tweaking font size, weight, or color
* Changing backgrounds, borders, or shadows
* Replacing or editing images
* Making small layout changes without affecting the rest of the page
If you know what you want to change and where, Visual edits is usually the fastest option.
## **How Visual edits works**
Visual edits is element-based.
When you select an element, Macaly shows all available settings for that element in a panel on the left. These settings depend on the type of element you selected, such as a section, text block, or image.
Some changes can be applied deterministically and appear immediately. In other cases, Macaly uses AI to apply the change. When AI is used, Macaly provides it with additional context about the selected element so only the intended change is made.
Even when AI is involved, edits stay scoped to the selected element and typically use fewer credits than a general prompt, because the AI receives clear instructions and precise context.
## **Selecting elements**
To start editing:
1. Click **Visual edits**
2. Click on an element on the page
The selected element is highlighted on the canvas, and its settings appear in the left panel.
You can select:
* Sections and containers
* Text elements such as headings and paragraphs
* Images
* Buttons and other UI elements
If something is selectable, it can be edited.
 ## **Navigating between elements**
Sometimes clicking directly on an element is not enough.
This usually happens when:
* Elements overlap
* A child element covers its parent
* An element is positioned above another using absolute positioning
To handle this, Visual edits includes navigation controls:
* **Go to parent** to select the element that contains the current one
* **Select next element** or **previous element** to move through nearby elements
This is especially useful when you need to edit a background image, a container behind text, or a layout element that can’t be clicked directly.
## **Navigating between elements**
Sometimes clicking directly on an element is not enough.
This usually happens when:
* Elements overlap
* A child element covers its parent
* An element is positioned above another using absolute positioning
To handle this, Visual edits includes navigation controls:
* **Go to parent** to select the element that contains the current one
* **Select next element** or **previous element** to move through nearby elements
This is especially useful when you need to edit a background image, a container behind text, or a layout element that can’t be clicked directly.
 ## **Editing sections and layout**
When a section or container is selected, Visual edits focuses on layout and structure.
You can adjust:
* Width and height
* Padding and margin
* Background color
* Border style, width, and color
* Radius and shadow
* Opacity
* Spacing between elements
These controls help you shape how content is arranged without changing the content itself.
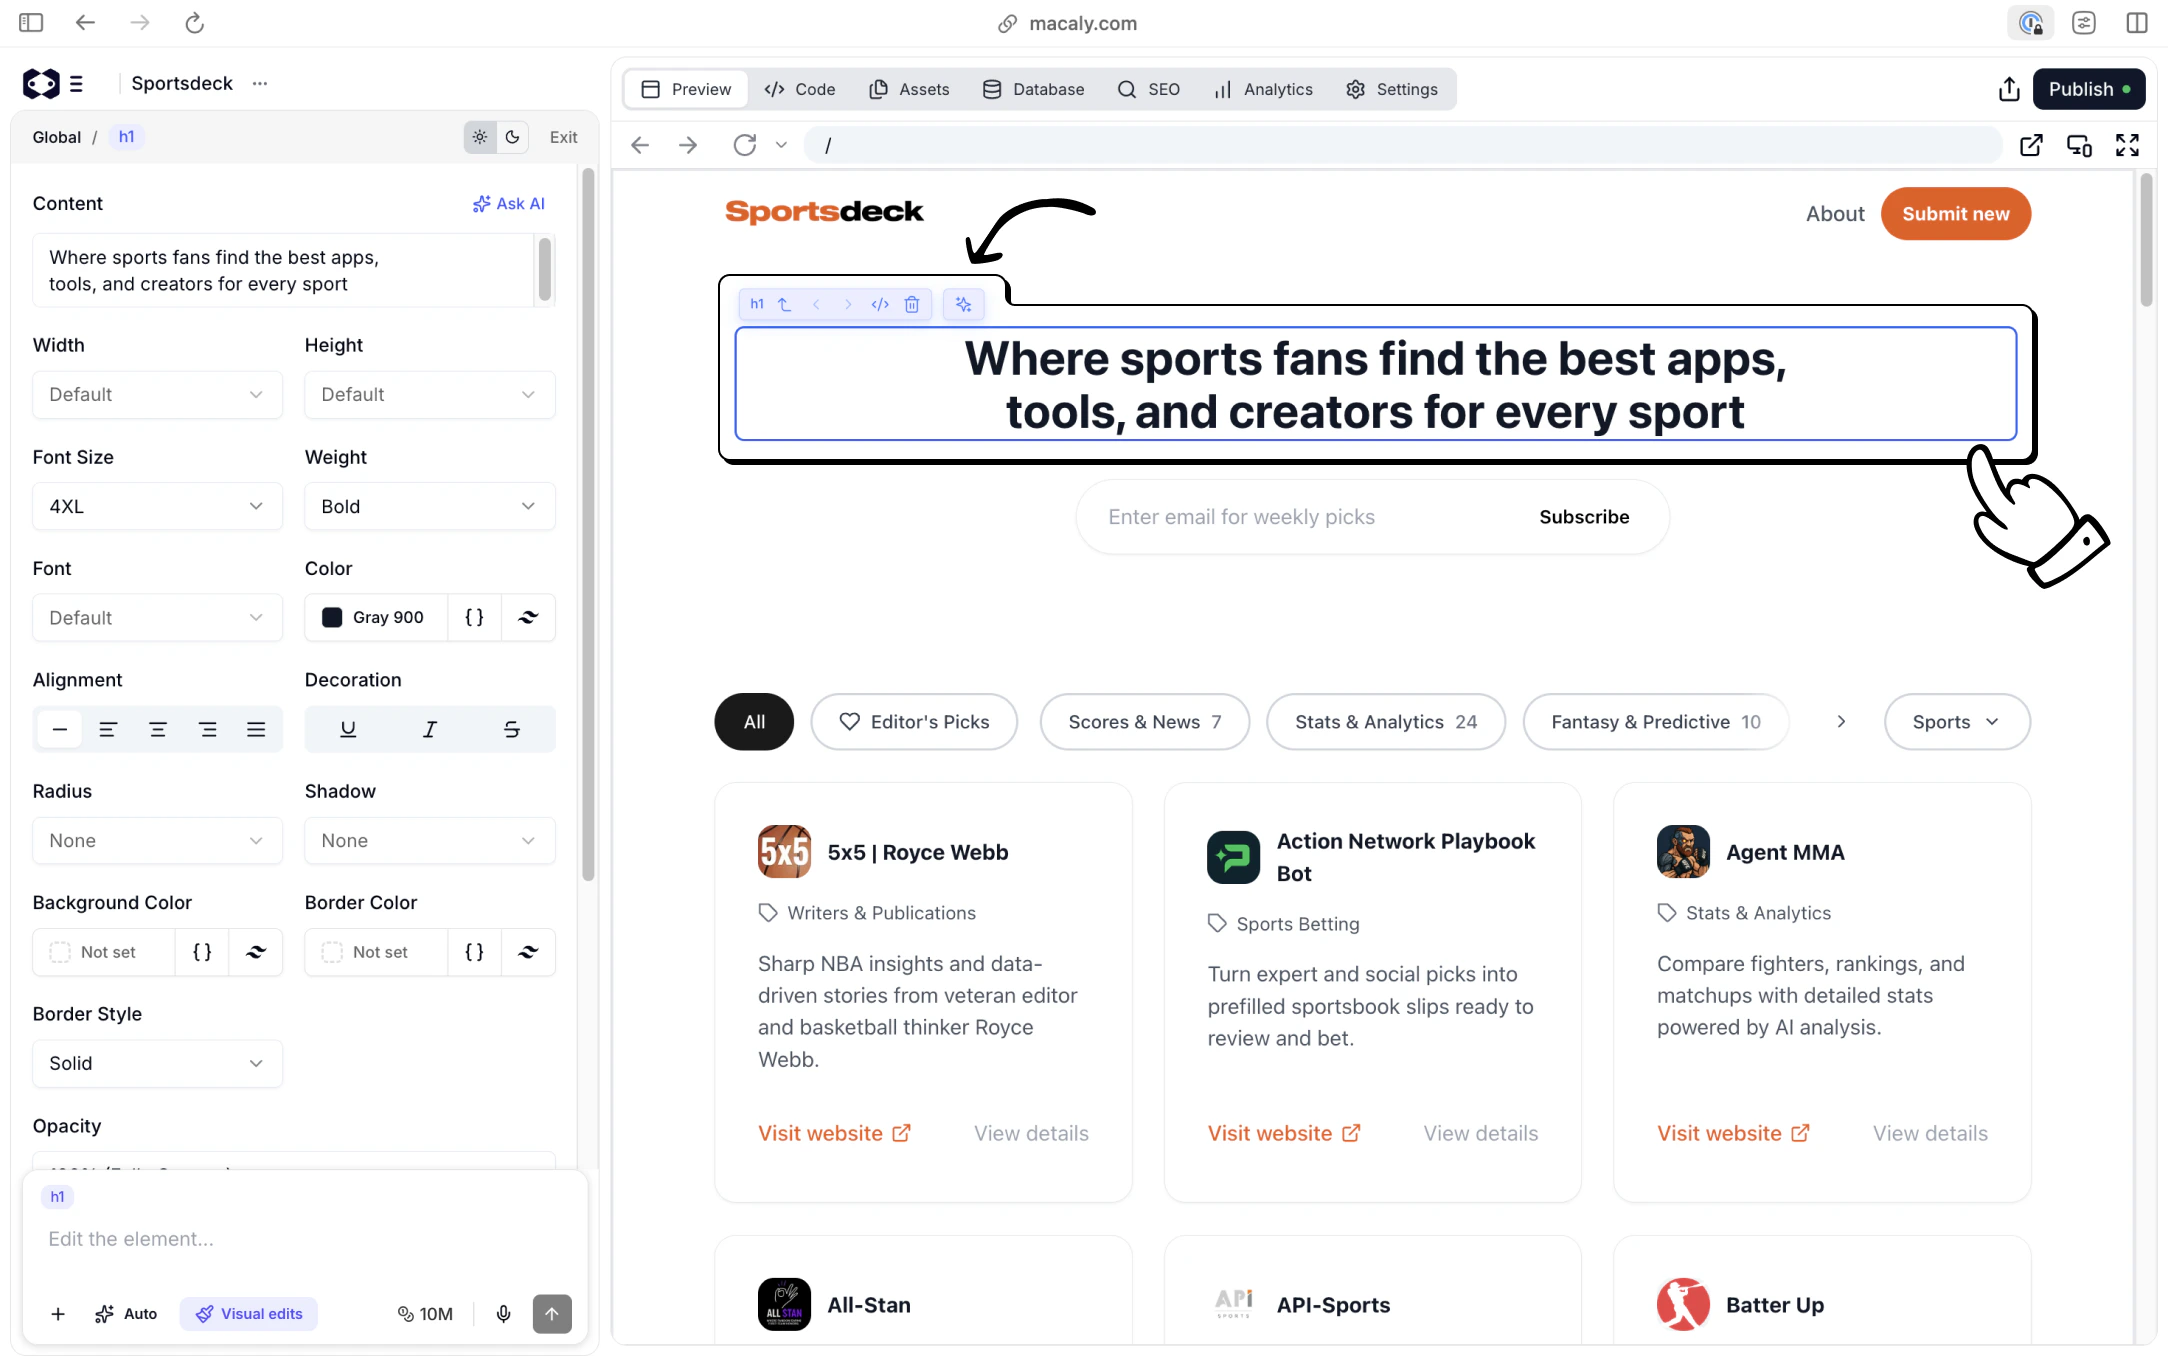
## **Editing text**
Text can be edited directly on the page.
You can:
* Click into the text and rewrite it inline
* Change font size, weight, and alignment
* Adjust text color and decoration
* Control spacing and layout behavior
This makes copy changes fast and easy to verify visually.
You don’t need to re-prompt the AI just to change a sentence.
## **Editing sections and layout**
When a section or container is selected, Visual edits focuses on layout and structure.
You can adjust:
* Width and height
* Padding and margin
* Background color
* Border style, width, and color
* Radius and shadow
* Opacity
* Spacing between elements
These controls help you shape how content is arranged without changing the content itself.
## **Editing text**
Text can be edited directly on the page.
You can:
* Click into the text and rewrite it inline
* Change font size, weight, and alignment
* Adjust text color and decoration
* Control spacing and layout behavior
This makes copy changes fast and easy to verify visually.
You don’t need to re-prompt the AI just to change a sentence.
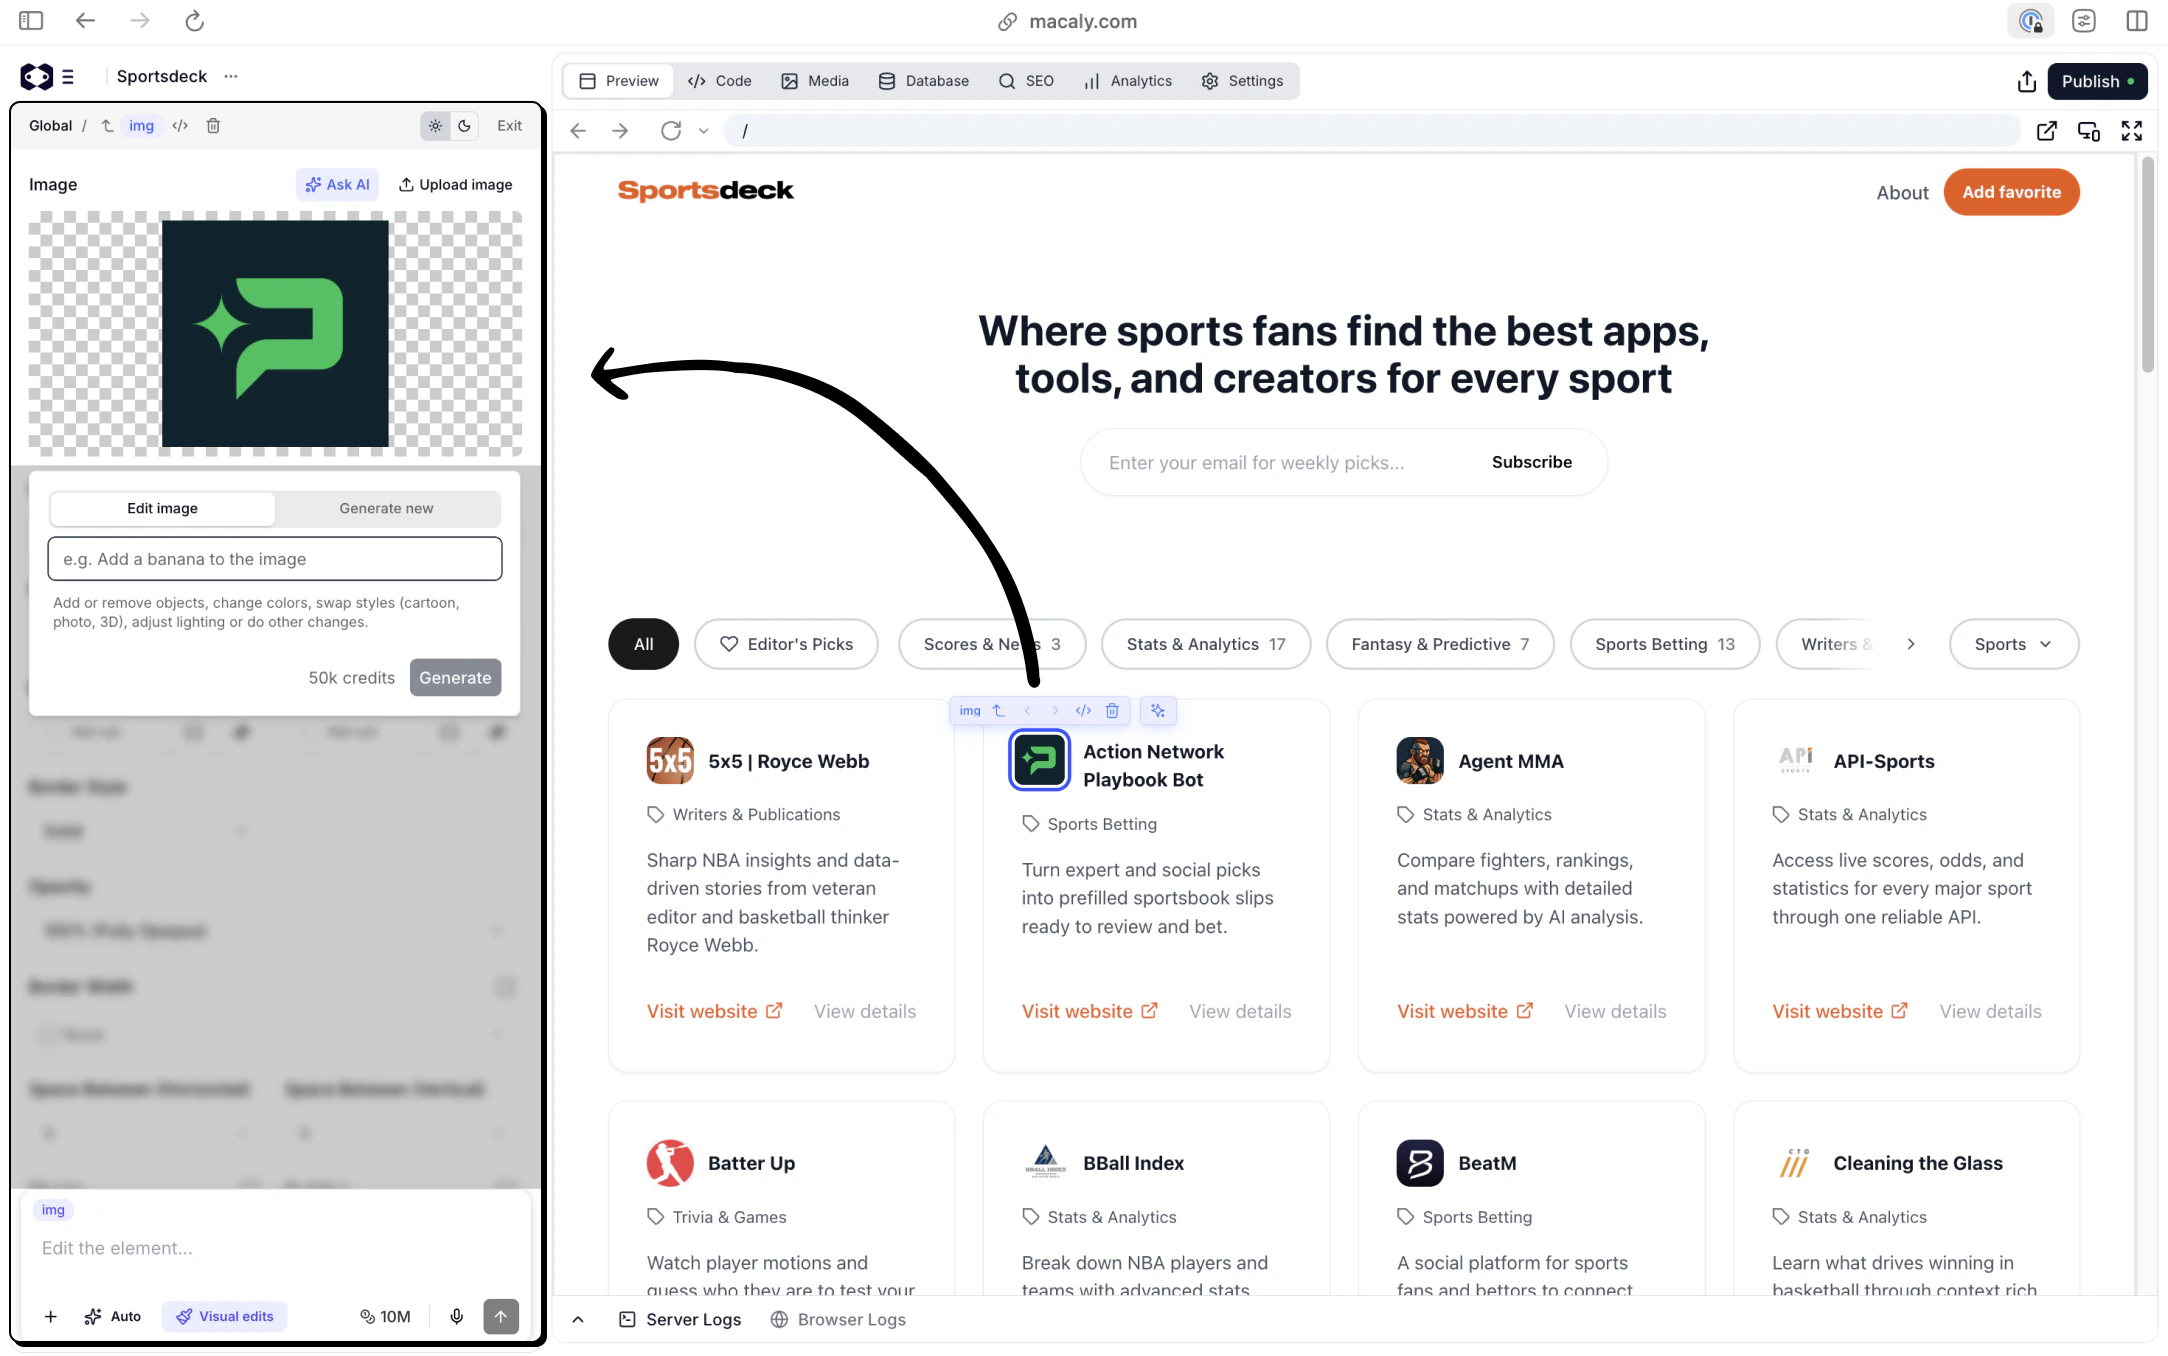
 ## **Editing images**
Images are edited the same way as other elements.
You can:
* Upload or replace an image
* Adjust width, height, border radius, shadow, and opacity
You can also use Ask AI to modify images by describing what you want to change, for example:
* Making an image feel more minimal
* Adjusting colors or contrast
* Adding or removing visual elements
Ask AI for images is designed for creative adjustments without needing image editing tools.
## **Editing images**
Images are edited the same way as other elements.
You can:
* Upload or replace an image
* Adjust width, height, border radius, shadow, and opacity
You can also use Ask AI to modify images by describing what you want to change, for example:
* Making an image feel more minimal
* Adjusting colors or contrast
* Adding or removing visual elements
Ask AI for images is designed for creative adjustments without needing image editing tools.
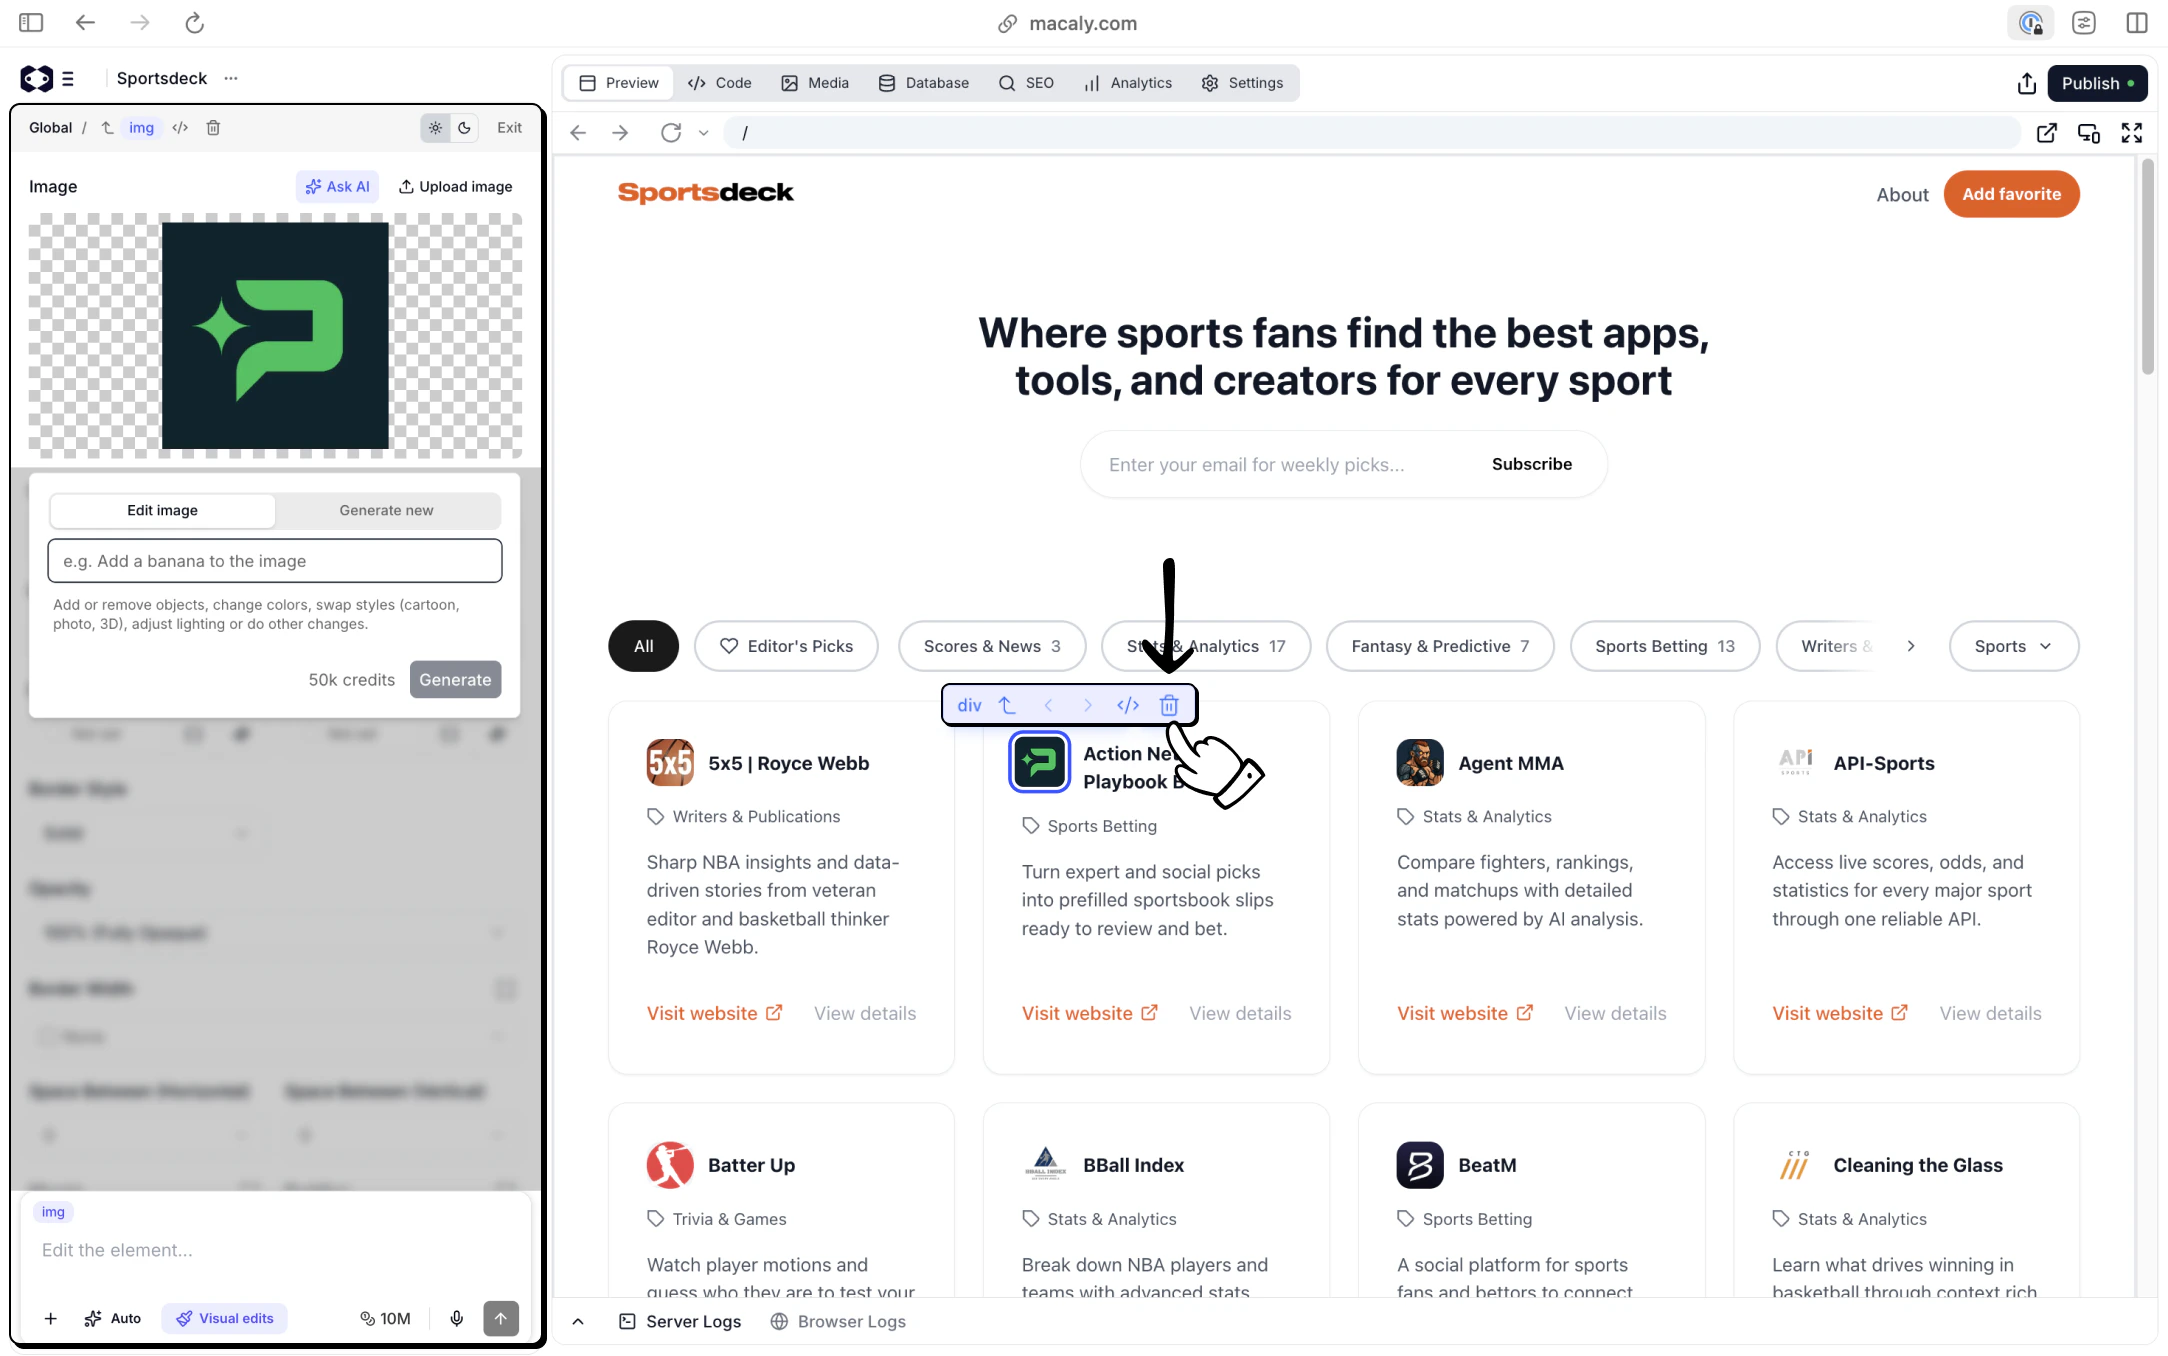
 ## **Removing elements**
Visual edits also lets you remove elements.
This is useful when:
* You want to clean up generated layouts
* A section or element is no longer needed
* You want to simplify the page structure
Removing an element only affects that specific element and does not change the rest of the page.
## **Removing elements**
Visual edits also lets you remove elements.
This is useful when:
* You want to clean up generated layouts
* A section or element is no longer needed
* You want to simplify the page structure
Removing an element only affects that specific element and does not change the rest of the page.
 ## **Using AI within Visual edits**
Visual edits can work together with AI.
When an element is selected, you can write a prompt that applies **only to that element**. This scopes the AI’s changes and prevents updates to other parts of the page. This is useful when you want help rewriting text or adjusting an image, but don’t want broader changes.
For example:
* “Rewrite this headline to be shorter”
* “Make this image feel more minimal”
* “Adjust this paragraph to sound more professional”
The AI will only modify the selected element.
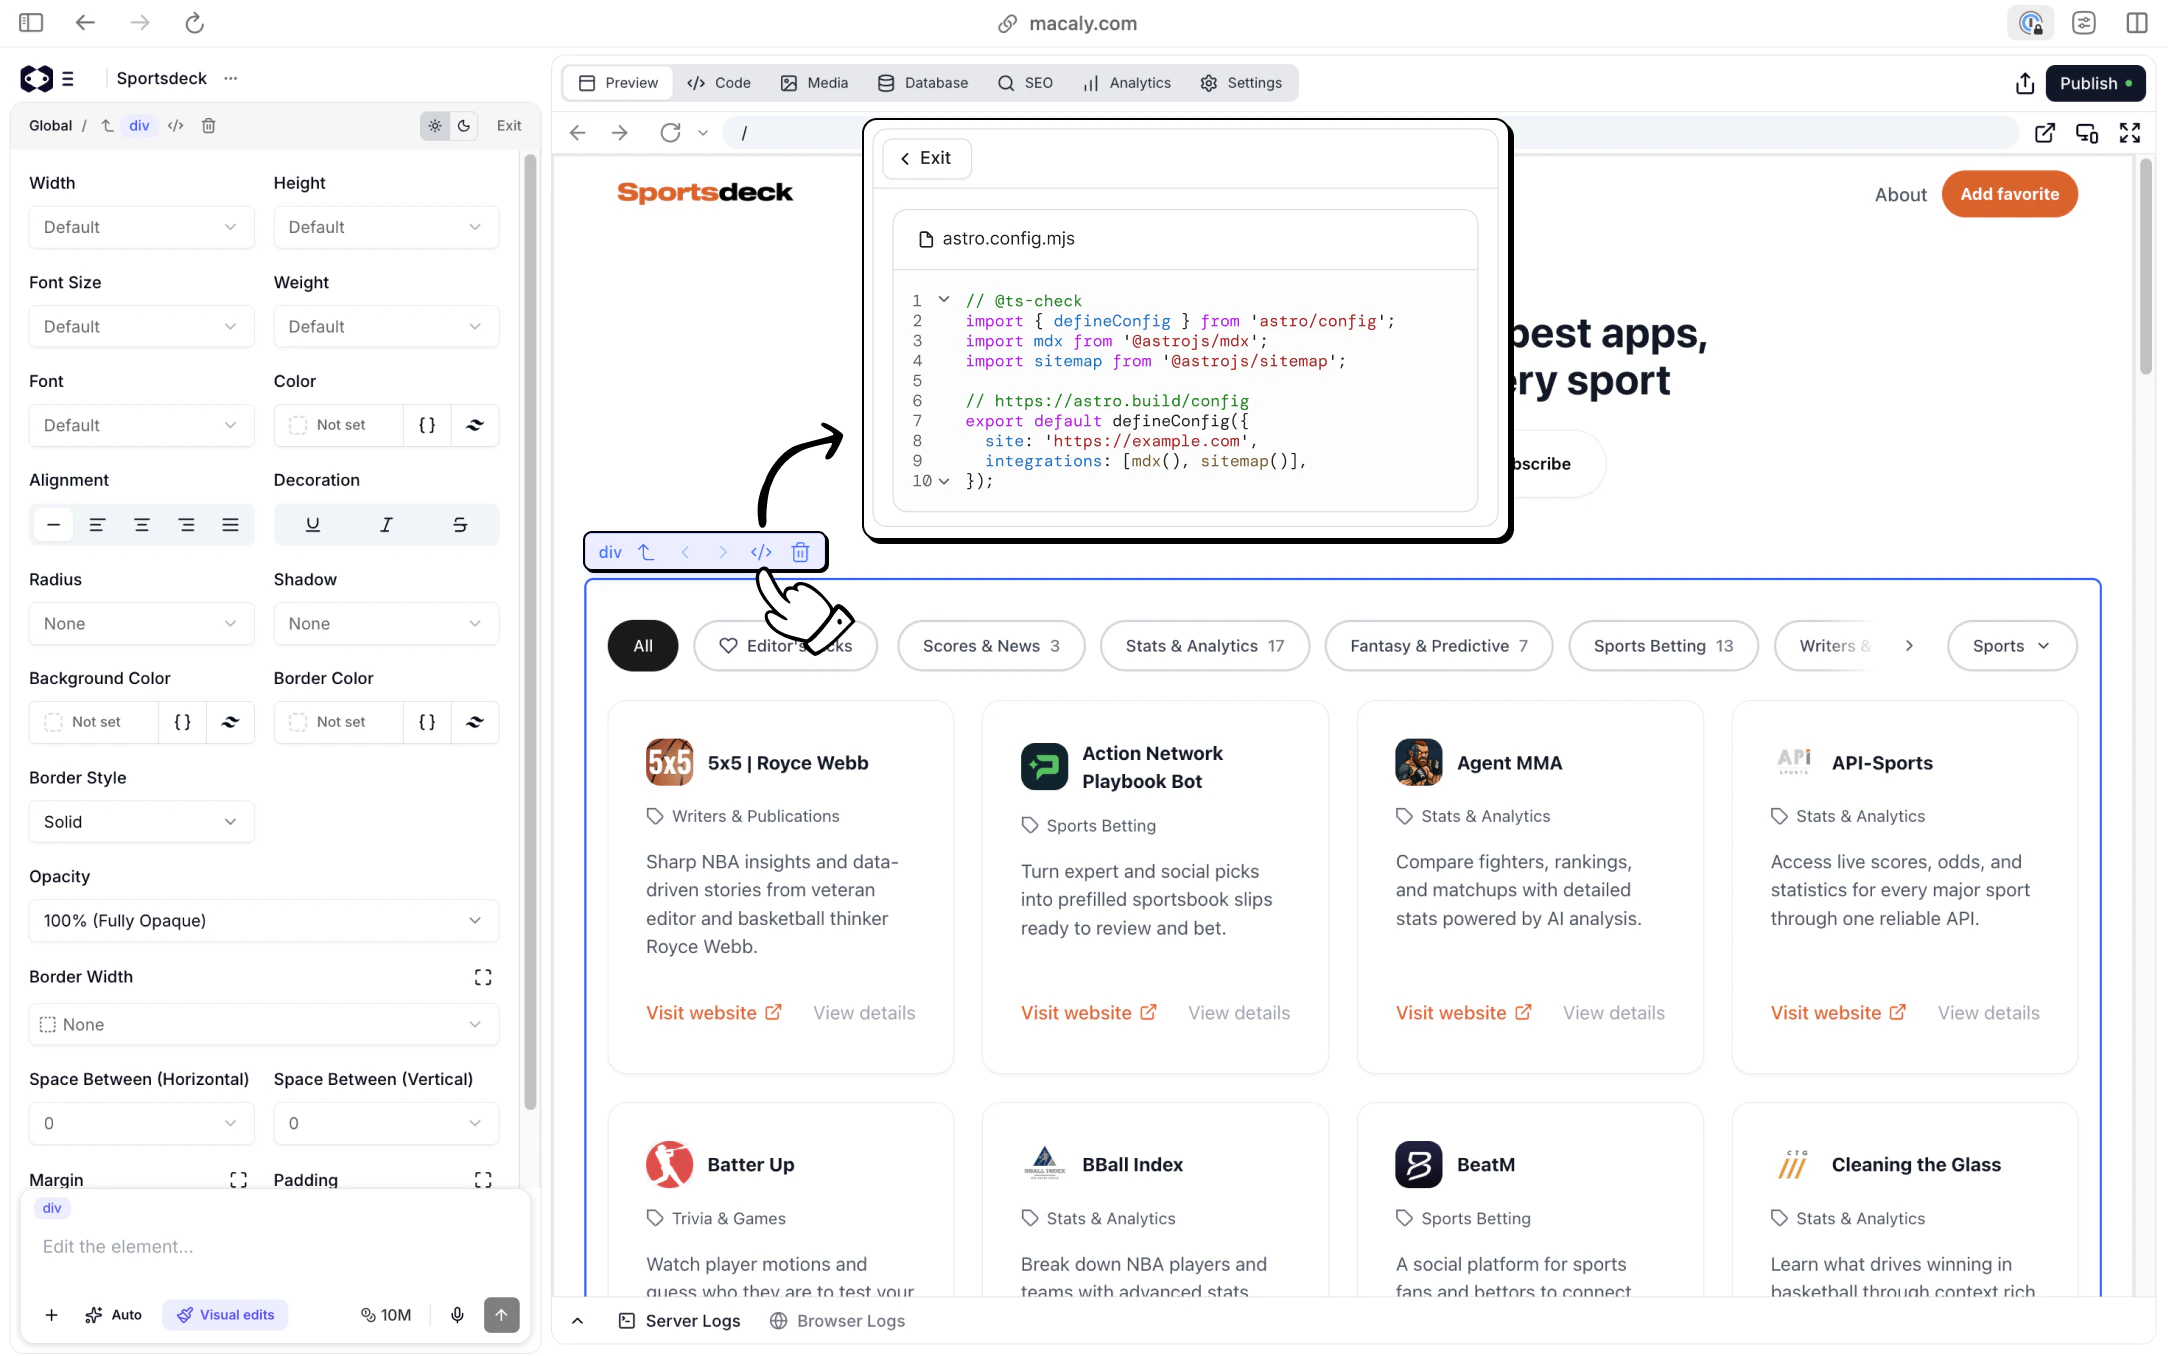
## **Go to code**
For users who want deeper insight, Visual edits includes **Go to code**.
This opens the source code for the selected element. You don’t need to edit the code to use Macaly, but this option is useful if you want to understand how a specific element is structured.
## **Using AI within Visual edits**
Visual edits can work together with AI.
When an element is selected, you can write a prompt that applies **only to that element**. This scopes the AI’s changes and prevents updates to other parts of the page. This is useful when you want help rewriting text or adjusting an image, but don’t want broader changes.
For example:
* “Rewrite this headline to be shorter”
* “Make this image feel more minimal”
* “Adjust this paragraph to sound more professional”
The AI will only modify the selected element.
## **Go to code**
For users who want deeper insight, Visual edits includes **Go to code**.
This opens the source code for the selected element. You don’t need to edit the code to use Macaly, but this option is useful if you want to understand how a specific element is structured.
 ## **Visual edits vs AI generation**
Most projects use a combination of both.
Use **Visual edits** when:
* You want precise, local changes
* You are refining existing content
* You want full control over layout and styling
Use **AI generation** when:
* You are creating something new
* You want broader changes
* You are exploring different directions
## **Summary**
Visual edits gives you focused control over your project.
You select an element, see exactly what can be changed, and apply edits visually. Some changes happen immediately, others use AI with additional context, but all edits stay scoped and controlled.
This makes it easier to refine layouts, content, and visuals without losing track of what’s changing or why.
## **Visual edits vs AI generation**
Most projects use a combination of both.
Use **Visual edits** when:
* You want precise, local changes
* You are refining existing content
* You want full control over layout and styling
Use **AI generation** when:
* You are creating something new
* You want broader changes
* You are exploring different directions
## **Summary**
Visual edits gives you focused control over your project.
You select an element, see exactly what can be changed, and apply edits visually. Some changes happen immediately, others use AI with additional context, but all edits stay scoped and controlled.
This makes it easier to refine layouts, content, and visuals without losing track of what’s changing or why.